When most people think of a kayak, this is typically what
comes to mind; a 9’ to 10’ sit-inside kayak similar to this one sold by brands
like Ascend, Pelican, Lifetime, Field & Stream, and more. This type and
class of kayak is probably the most common kayak sold in the country, and many
people are using them for recreational fun or even fishing. These kayaks are
lightweight and shorter in length, making them easy to transport and store.
Some of the kayak brands in this category offer fishing versions that feature
accessory track, storage for gear and tackle, and a comfortable seat, but some
do not.
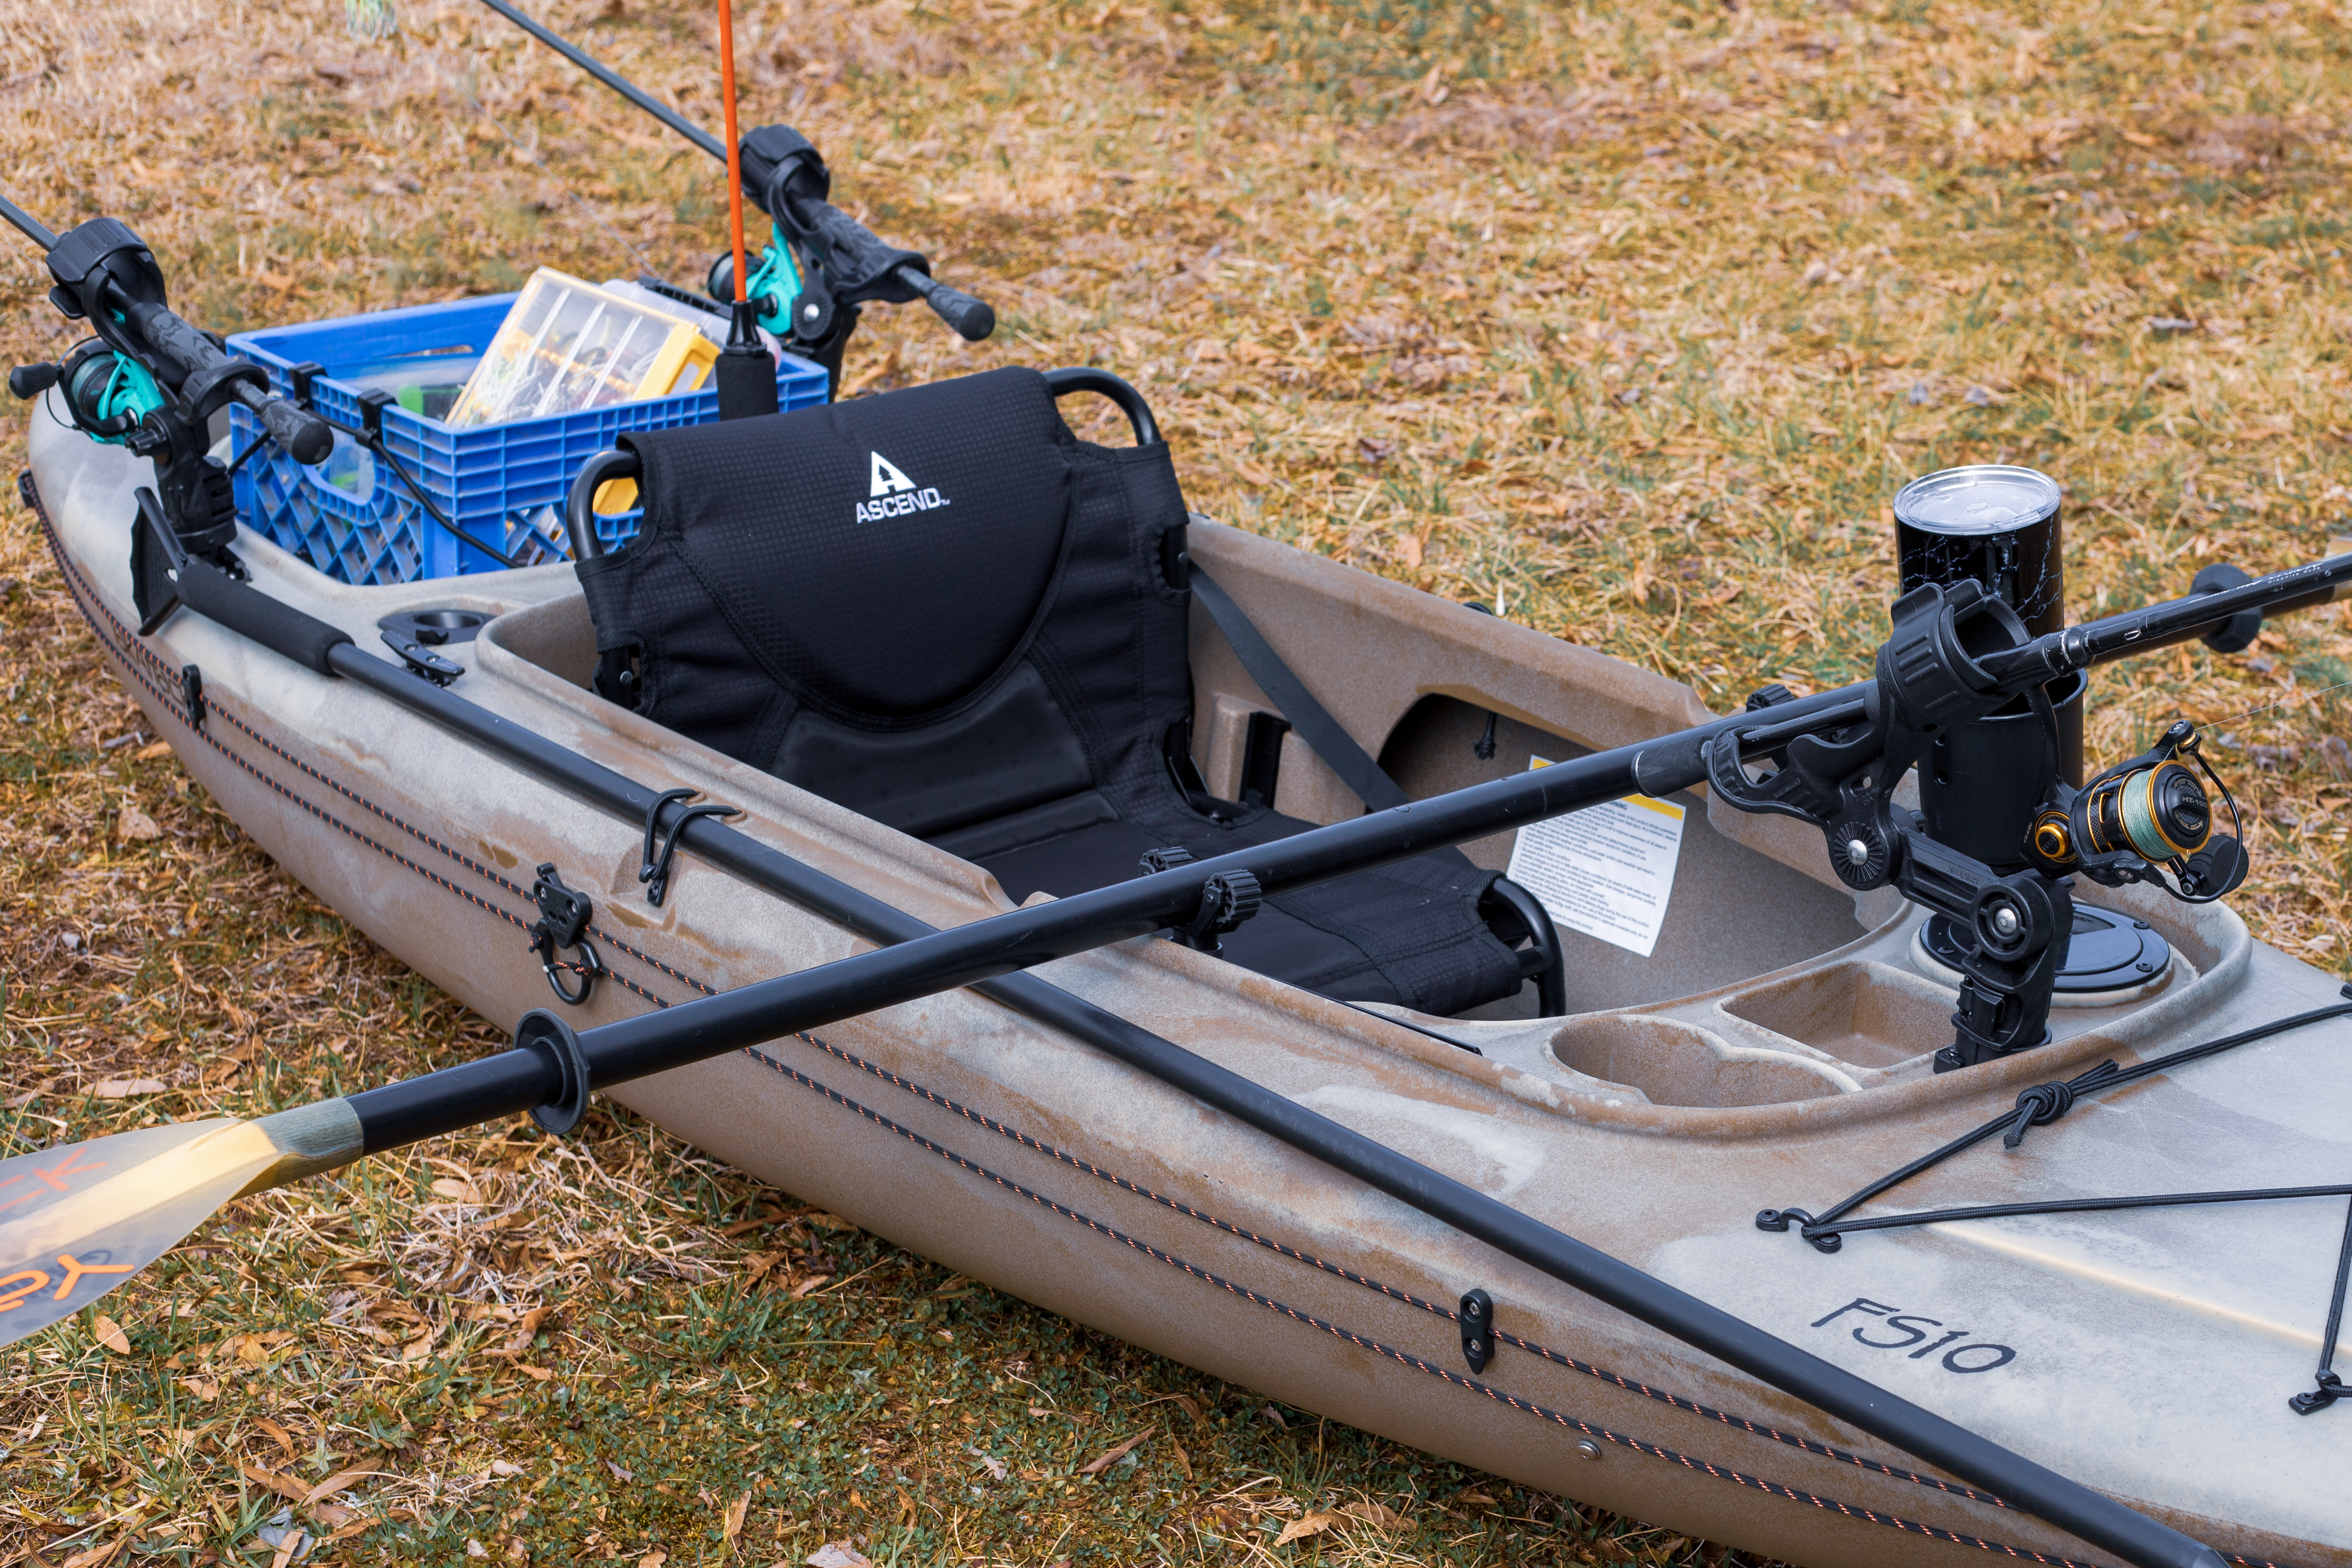
The Ascend FS10 is a sit-in kayak that comes in at 10’ long, 30” wide, and weighs 57 lbs with the seat. For just the kayak and the seat, the kayak sells for $599.99 at Bass Pro Shops, Cabela’s, and other Ascend retailers. Back in the early days of kayak fishing, I remember having to make a case to both the husband and wife for how the kayak could be used to see if it fit their needs and budget. Many families purchase this type of kayak, and it gets used for floating the river having fun, bird watching, hunting, fishing, and anything in between. For this build, we wanted to add the bare necessities for how we like to kayak fish and not go overboard with it. The whole point of this kayak is a lightweight grab-and-go, and we did not want to affect that by adding a fishing finder and a bunch of other gear. Purely the essentials and relatively easy rigging that anyone can do at home with only a few basic tools.

The first modification on the FS10 was the addition of the LeverLoc Anchor Trolley. When you first start kayak fishing, you instantly
realize how impactful the wind is, so having some type of anchoring system is a
great first line of defense. An anchor trolley allows you to change your pivot
angle, allowing you to optimize boat positioning while fishing in the wind and
current. It features a pulley mounted on the side of the kayak near the bow and
stern and a plastic ring connected by a loop of 550 paracord. The plastic ring
is your pivot point, and with springtime fishing around the corner, the anchor
trolley will primarily be used when fishing shallow in conjunction with our 6’ ParkNPole. When not in use, the ParkNPole will be stored in the stock area
designed for paddle storage via bungee on the left or right side of the
cockpit.
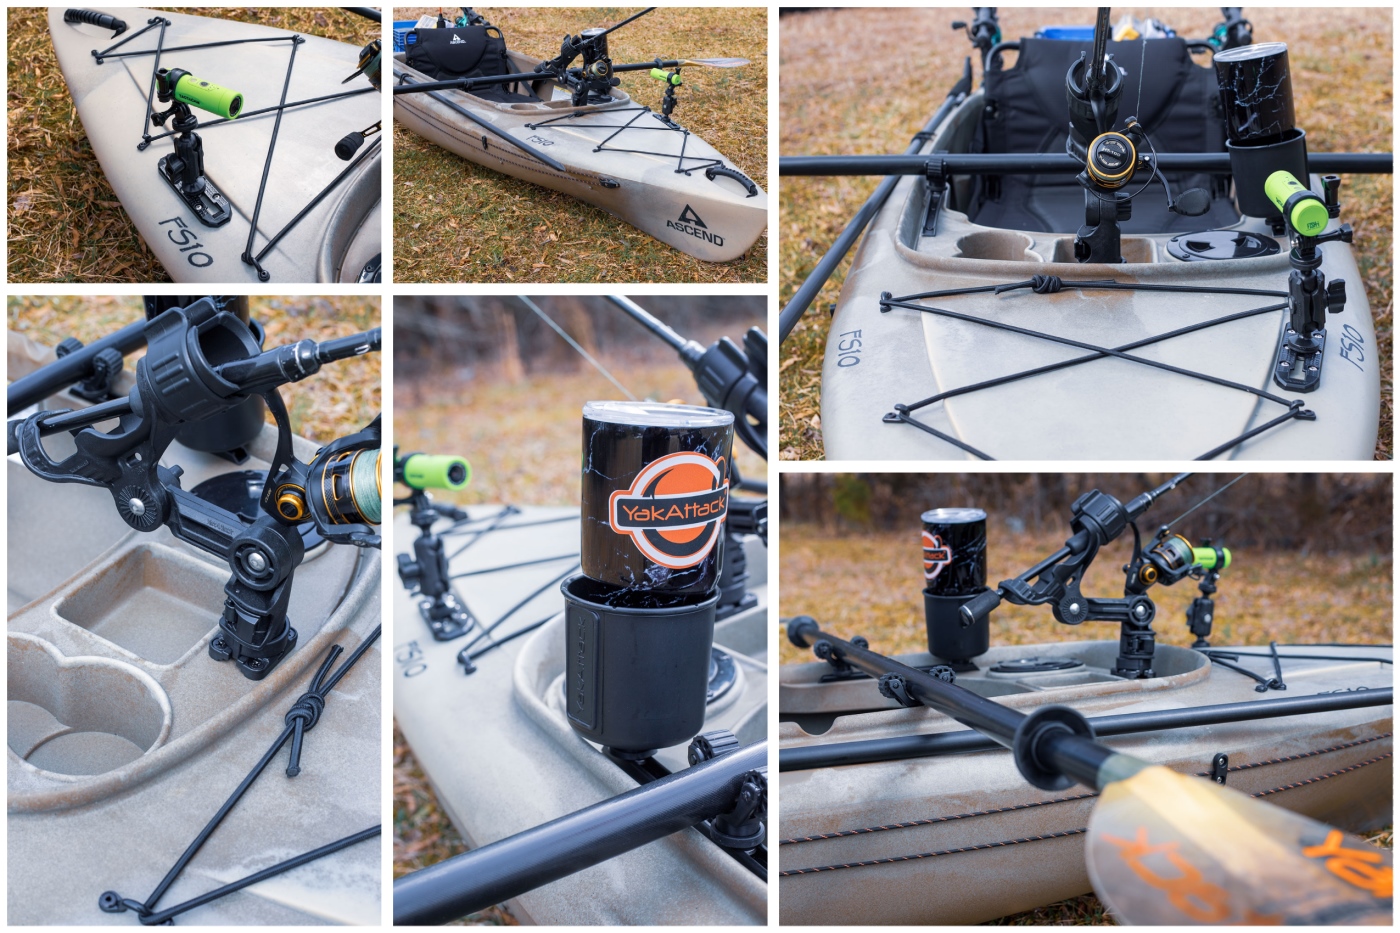
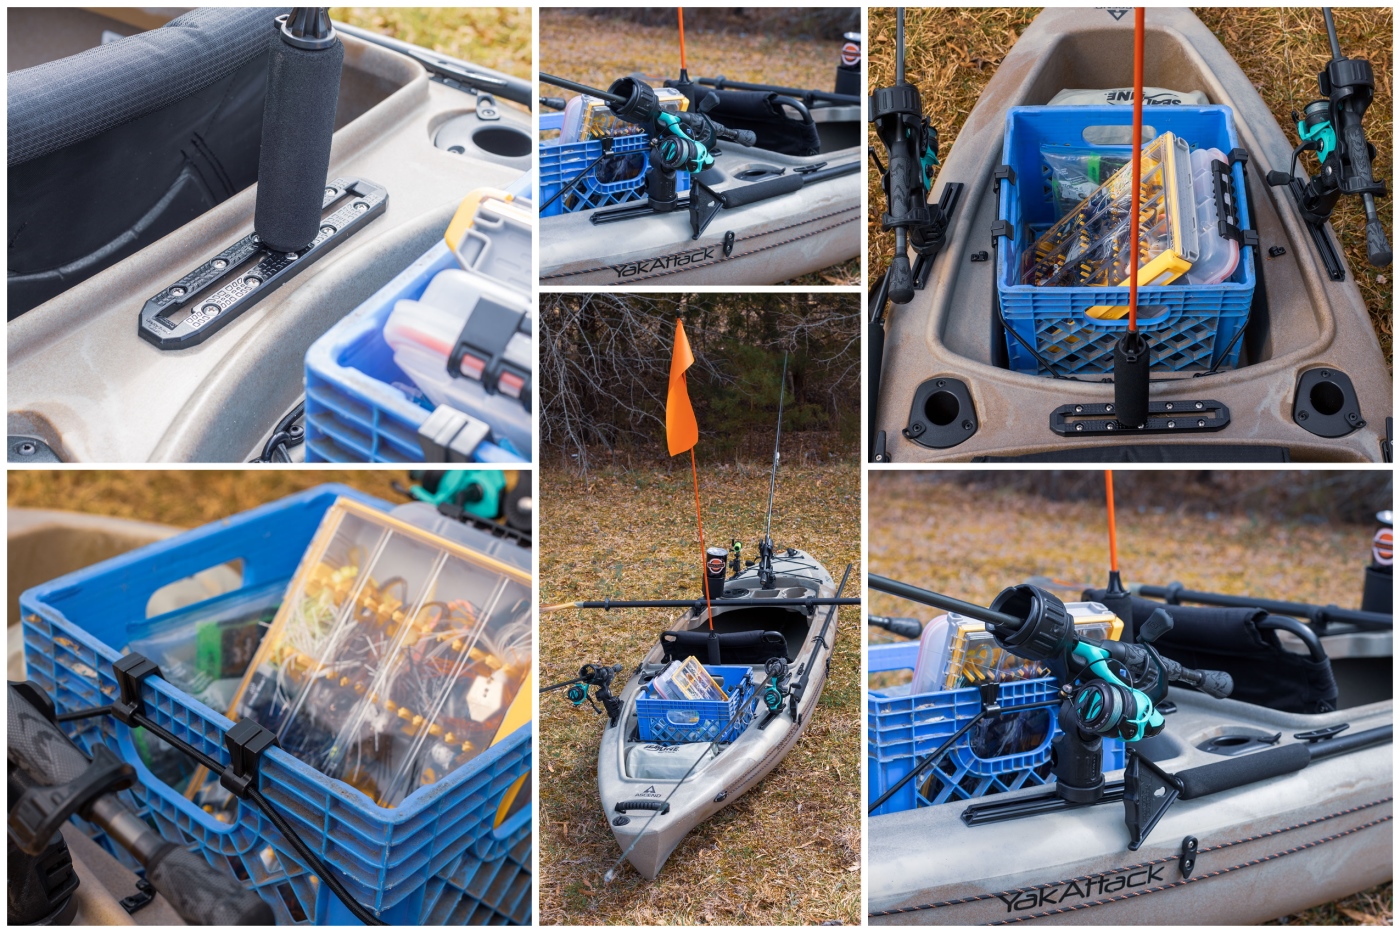
Next up on the list of needed additions was rod holders. For this build, I wanted a centrally located Omega Pro Rod Holder mounted in front of the cockpit and centered. This location would keep the rod holder and rod out of my paddle stroke but also be very easy to access. To attach the Omega Pro a MightyMount II was installed as the track mount. Even though the kayak comes with two flush-mount rod holders, I prefer the versatility of using the Omega. It allows me to use spinning, casting, as well as fly rods, and the advantage of the Omega over stock flush-mount rod holders is going to be the ability to keep my rod tips at a lower angle. If this kayak is used to float the local river, things get tight, and keeping your rod tips down is necessary. Two sections of 8 inch GTSL90 GearTrac were added to attach the two Omega Rod Holders near the rear tankwell.


One of the main aspects that separate a standard kayak from
a fishing kayak is storage. A MultiMount Cup Holder was added at the front of
the cockpit, as well as two RotoGrip Paddle Holders for a more secure and quiet
paddle storage solution. The rear tankwell was pretty small, so we had to use a
standard 12” x 12” crate with no rod tubes. To secure the crate in place, OmniHooks were added to the stock tankwell bungee. OmniHooks are essentially
molded hooks that slide onto the stock bungee of your kayak and make securing
milk crates, five-gallon buckets, or even our BlackPak super easy and are a
must-have add-on for any kayak. They only take a few minutes to install, and
for $10.00, they are hard to beat for added value.
The other main feature I wanted on any kayak is a flag or
LED mounted behind the angler. With this kayak being smaller and less
expensive, it will most likely be used during daylight hours, so our
track-mounted VISIFlag was the go-to option. The VISIFlag is an inexpensive
daytime visibility option and attaches to any YakAttack track. There was a
perfect spot behind the seat for a 9" MightyMount XL track, and it will
serve as the mounting platform for the VISIFlag. It was easy to install and
looks great on the kayak.
With most of the necessities of anchoring, rod holders, and
visibility being covered, we decided to add a 6" MightyMount XL track for
an Articulating Camera Mount and a Tactacam action camera. Filming or capturing
photos of days on the water, catching fish, or having fun with friends and
family is always a great way to store the memories. Overall the rigging for
this kayak was kept fairly minimal. Next up is a day on the water, as time
spent fishing and paddling is the only thing that will tell us if we need to
change or add anything. If you have an Ascend FS10 kayak or a similar kayak and
need rigging advice feel free to give us a call at 434-392-3233 or send us an
email at support@yakattack.us.
